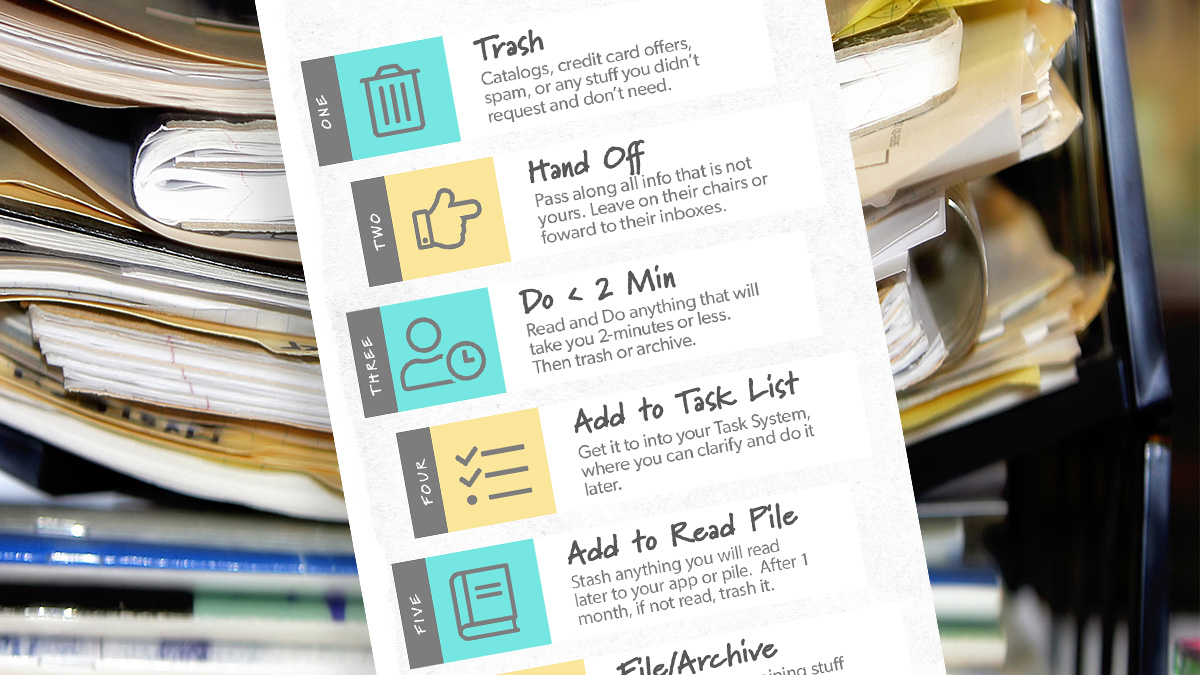
You may disdain hoarders, those people who collect so much stuff they can’t walk through their homes. But have you ever considered you might be one yourself?
I can get through my front door, you gloat. I’m not that.
Sure, your problem may not be as obvious.
But consider all the information you accumulate — email, files on your computer, or even physical papers around your house:
- Do you waste too much time shuffling through mounds of stuff when you sit down to work on an important task?
- Would you be embarrassed to let your friends take a peek inside your home office?
If overloaded inboxes frustrate and embarrass you, you’re not alone. But there is a simple fix.
Organize the information in your inboxes without fuss by following this simple Inbox Triage method.
An overview of Inbox Triage
With Inbox Triage, every time you look at something in your inbox, you follow a 2-step procedure to dispatch it:
- Choose—from among six options—what needs to be done with the item, and then
- Move it—out of your inbox—into the right organizing app or pile.
Inbox Triage: Choices and Locations
| Choose whether to: | Then move it |
| 1. Trash it | Trash/Recycle Bin |
| 2. Hand it off | Hand-Off Pile |
| 3. Do it, if less than 2-minutes | [Trash or To-Do List, if it takes >2 min] |
| 4. Do it later | To-Do List |
| 5. Read it later | Read-It-later App or Pile |
| 6. File or archive it | Home Filing System/Email Archive |
When you triage each piece of information, you’ll reach inbox zero the fast way.
Later, when you have the time, tools, and attention, you can put that information to use. You’ll find it quickly from within the relevant organizing app or pile.
This article shows you exactly how to triage your inboxes to zero. You’ll learn how to evaluate your information using the Inbox Triage Cheatsheet.
When you make Inbox Triage a habit, you keep information clutter out of your way.
The problem with other inbox management methods
It’s cheap and easy for people to send you information these days. The volumes of stuff coming your way will continue to accumulate at a faster pace.
You’ll need some way to separate the useful stuff from the rest of the cruft that clogs your inboxes.
While tools such as email filters can reduce the amount of information you receive, too many things will continue to penetrate these crude barriers.
You’ll inevitably have to do some final sorting for yourself.
Perhaps you’ve already tried some techniques to take control of your inboxes. Maybe you’ve sorted your information into folders or applied categorical tags.
If so, you know these methods don’t work over the long haul. Your circumstances change. Categories from last year don’t carry over to this year.
Rather than restructure your whole system yet again, you revert to keeping stuff in your inbox, hoping a simple search will surface information when you need it.
But if you are a typical parent with many little jobs to complete on behalf of your family, you’ve seen this strategy fail one too many times. Eventually, too much of what is important gets buried under the daily avalanche of the new.
After a few misses, you start to feel that you are letting down your loved ones, who depend on you to pay attention and follow through.
Why Inbox Triage works better
Inbox Triage is similar to the 2-step Emergency Room (ER) triage system at your local hospital:
- Step 1: Evaluate and classify
When you arrive at the ER, a professional follows a protocol to size up the urgency of your trauma and the scope of medical services required.
Similarly, with Inbox Triage, you make a quick decision—from among 6 choices—about what to do with a new item when you encounter it. - Step 2: Redirect to a proper treatment area
Then, that ER professional directs you to the appropriate place within the hospital to receive further care. You don’t get treated in the waiting room.
Likewise, with Inbox Triage, you send the item to your organizing apps or piles for further processing. You don’t let it languish in your inbox.
If you want to stop hoarding information, start acting like an ER professional: quickly evaluate and then redirect information out of your inbox, every time you take a peek.
Ashley, from Productive Parents
Inbox Triage works because you have only 6 choices to consider. No hemming and hawing over which folder to use or which label to assign.
And, these 6 Inbox Triage options don’t change over time. You’ll always have articles to Read Later or stuff to add to your To-Do list.
When you follow Inbox Triage, you’ll quickly develop well-worn paths to assess and move information. It will become as automatic and effortless as any of your other routines.
What organizing apps or piles do you need for Inbox Triage?
For a typical parent, the organizing apps or piles you need include:
- Trash,
- Hand-off piles,
- To-do list,
- Read-it-later piles
- Your household document filing system
These systems can be as basic or as elaborate as you want to make them. Chances are you already have most of these in your toolkit.
Note: Ensure you have a frictionless connection between your email inboxes and these other apps.
Ignore backlog when you start to Triage
You don’t put out a fire by cleaning up the ashes first.
While your existing mountain of information, known as your backlog, may be daunting to think about, just set it aside.
The stuff in your backlog—anything older than about 2 months—doesn’t contain anything that urgent or important for your day-to-day needs right now.
So, take a deep breath and set aside your backlog, such as:
- Emails
Place your old emails—anything older than 1-2 months— into a backlog folder in your email program. - Computer files
Place all your scattered computer files in a backlog folder on your desktop. - Papers
Place all your old physical papers in a backlog box.
Then eliminate this backlog from your thoughts. You still have the information on the back burner if you need it. In time, you will likely trash or archive it.
Focus your Triage efforts on new information coming your way because some of this stuff is urgent or important.
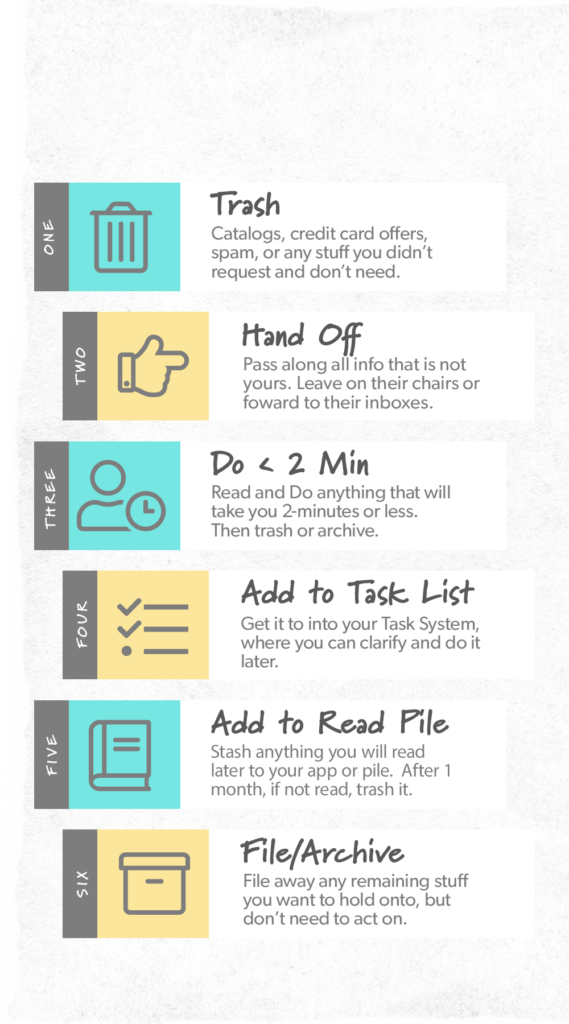
Use the Inbox Triage Cheatsheet to kickstart your habit
With backlog off your mind, you must do something you haven’t done in the past: triage all your incoming information when you check your inbox.
Starting out, use this Inbox Triage Cheatsheet to guide your decisions.

You can follow along with this Cheatsheet to clear out any inbox. It works on your electronic inboxes, such as your email, texts, and other online stuff.
And it works on your old-school inboxes—your mailbox, home office filing trays, wallet, or any other place you routinely stash information.
A step-by-step walkthrough of the Cheatsheet
Every time you check an inbox, follow this Inbox Triage process.
The rules:
For each piece of information you encounter, move through the 6-step filtering process, in order, to evaluate it.
Once you classify your item, immediately move it to the appropriate organizing container. Get it out of your inbox.
Then, pick up the next inbox item and repeat the Triage process from the top.
Do not skim
Filter 1: Trash
Immediately get rid of your item if it is spam or if it has no use to you. Keep your recycling bin nearby and learn the keyboard shortcut to trash an item in your email app.
Trash is unsolicited stuff that offers no value to your household, such
- Catalogs
- Free magazines
- Local ads and flyers
- Credit card offers
- Unfiltered email spam
Be ruthless. You may find some stuff that is nice to have around just in case, but don’t fall for that trap.
Often you can quickly recover solicitations through online research. Besides, your future needs change—if you don’t see a need for it now, you’re not likely to ever need it.
Learn to let go of useless information by using your trash.
If your item is not Trash, move on to the next filter.
Filter 2: Hand Off
Determine if this item belongs exclusively to others in your household.
If so, put it in a conspicuous pile they will be sure to find. (Desk chairs prove useful here.) Forward any digital stuff to them in a text or email.
By whatever means, get it off your plate.
In our house, mail, magazines, and other publications fall into this category.
Keep moving down to the next filter if your item isn’t a Hand-Off.
Filter 3: Do Under Two
Apply David Allen’s 2-Minute Rule. Ask yourself, Can I read or act on this information in 2 minutes or less?
If it will take you 2 minutes (or less) to do what the information requires, go ahead and take care of it during your Inbox Triage session.
Right away: pick up the phone, get out your calendar, give the article a quick skim. Then Trash the original item when you’re finished.
Examples of Do < 2 include:
- Make a quick booking call in response to appointment reminders
- Complete school permission forms and other sign-here documents
- Add notices of upcoming event date and time changes to your calendar
- Skim a magazine’s table of contents to see if it is worth adding to your Read-It-Later pile
- Add new contact information to your address book
- File shared photos into your photos app
- Complete the rsvp when you immediately know yes or no
Sometimes you can’t dispatch an item under 2 minutes, as you initially expected. In this case, break at a logical point and then move the item to your To-Do list (Filter #4).
If you can’t fully process this item as a Do Under Two, move down to the next filter.
Filter 4: Add to To-Do List
Determine if this piece of information contains something you need to take care of at a later time.
If so, send it off to your to-do list app (also called a task manager), if you have one.
If you don’t already have this organizing app, set one up pronto! See our Ultimate Guide: Shape Up Your To-Do List for an in-depth overview of how to a parent might want to configure and use an app.
To-Do List items often include:
- Rsvps that involve input from other family members
- Tax and other forms that take time to complete
- Explanations of benefits statements to reconcile
- Receipts to file for expense reimbursement
- Bills to pay
- Notice about an optional service upgrade you want to research further
- …Any piece of information that requires your follow-up—and takes longer than 2 minutes to complete
By offloading these To-Do items to a to-do list app, you segment out this important task-related information from everything else.
Your to-do list app holds items for you to work on later when you are in task management mode.
Move on to the next filter if this is not a To-Do item.
Filter 5: Add to Read-It-Later Pile
Assess if this is an item you want to read or study in depth
Such items might include newsletters, magazine artciles, or books you want to read
Most of us have a physical Read-It-Later system, whether it is a pile on the nightstand, a magazine rack in the bathroom, or a bin by the sofa.
If you have a physical Read-It-Later item, immediately add it to your existing system.
Keep in mind that you consume a lot of digital information that may also fall into this Read-It-Later category.
These digital items need also need a Read-It-Later pile. You can use an app for this (such as the Readwise Reader), or you can set up a Read-It-Later folder on your computer.
An alternative is to send the article directly to your To-Do list, giving it the “Add to To-Do List” treatment of Filter #4.
Whatever your method, get these articles out of your inboxes. You want to store them in places that are easy to access when you have some quality reading time on your hands.
If your item doesn’t fall into the Read-It-Later category, move on.
Filter 6: File /Archive
Having run through all the previous filters, you should be confident that this remaining item belongs in your Filing system.
Classify anything you may need to reference at a later date as a File item.
(If you’re not sure, run back through the other Triage steps again. You may have a misclassified To-Do or Read-It-Later item on your hands.)
File items include:
- Notes/ideas you want to archive
- Project-specific material, such as party planning information
- Tax-related receipts — paid bills, statements, and forms to keep for tax purposes
- Store receipts for items you may want to return
- Receipts for insured personal items
- Appliance manuals
- Medical records
- Home and car service records
- Take-out menus
- Shared photos you want to keep
- School directories
- …or anything you aren’t comfortable tossing
Keep in mind, though, that any item you classify under File should not have a To-Do (filter #4) attached to it. You need to make sure you have sent all your To-Dos—such as a bill to pay—to your To-Do list first.
Get into the habit of moving your File items out of your generic inboxes and into your home filing system when you Triage. You can organize it more thoroughly from within that system at a later time.
Sometimes you need to rename or otherwise manipulate a file before you put it away. If so, take < 2-minutes to prep the item during your Triage.
If your item is information in an email, and you still aren’t sure what to do with it at this point in your Triage, archive it. Don’t worry about further sorting. If you do need that item later, you can always search your email archives.
That’s it. You’ve successfully filtered and redirected an inbox item. Now go to the next item at the top of your inbox and repeat the Inbox Triage process.
With Inbox Triage you can take control of your overloaded inboxes
Use Inbox Triage to classify and relocate any piece of information that comes your way.
Simply work each item through the 6 filters from the Cheatsheet:
- Trash it
- Hand it off
- Do it, if less than 2-minutes
- Add it to your to-do list
- Add it to your read-it-later app or pile
- File or archive it
Stop hoarding that excess of information that lards your inboxes every day—and start Triaging instead.
Your mental load will feel much lighter when you eliminate information clutter throughout your household.

